Revolutionize Your Upholstery Projects: Discover the Power of the Tufting Gun
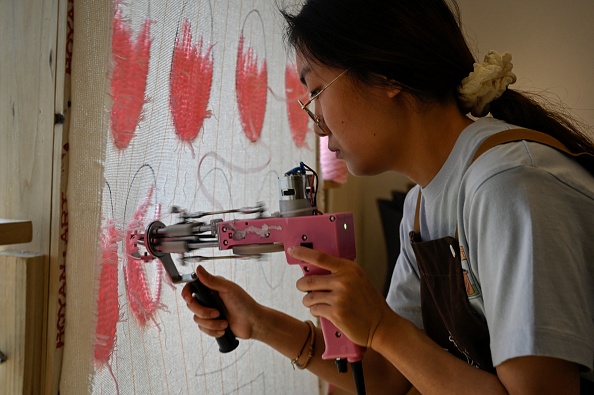
This photo taken on April 2, 2022 shows a staff member using a craft gun to create patterns on stretched fabric at a tufting workshop in Beijing. - Tufting, as a newly-emerged arts and crafts activity, is quickly taking over traditional embroideries to become one of the favourite pastimes for young Chinese. - TO GO WITH China-art-tufting,FEATURE (Photo by Jade GAO / AFP) / TO GO WITH China-art-tufting,FEATURE (Photo by JADE GAO/AFP via Getty Images)
Have you ever struggled to create professional-looking tufted upholstery? Whether it’s for a chair, sofa, or headboard, achieving uniform and neat tufts can be a challenge. That’s where the power of the tufting gun comes in.
This innovative tool has revolutionized the process of tufting by making it faster, easier, and more precise. With just a few simple steps and the right technique, you can achieve flawless tufts that will elevate your upholstery projects to the next level. In this article, we’ll explore everything you need to know about using a tufting gun and how it can transform your DIY upholstery game.
The Power of Tuftingguns
Tufting guns have revolutionized the world of upholstery projects. These innovative tools have eliminated the need for hand-tufting, allowing upholsterers to complete projects in a fraction of the time it would take using traditional methods. Tufting guns work by firing small metal pins through layers of fabric and foam, creating tight and even tufts.
One of the biggest advantages of tufting guns is their ability to create uniform tufts quickly and easily. This is especially important for larger projects, such as sofas or sectionals, where hand-tufting can be time-consuming and tedious. With a tufting gun, an upholsterer can produce consistent results in much less time.
Another benefit of using a tufting gun is that it reduces strain on the hands and fingers that can result from repetitive motion during hand-tufting. This makes it easier for upholsterers to take on more complex projects without experiencing discomfort or fatigue. Additionally, because tufting guns are so efficient at producing even tufts, they often require less material than traditional methods which means lower cost overall. Overall, incorporating a quality tufting gun into your upholstery toolkit could significantly improve both your efficiency and the quality of your finished products!
Benefits of using a tufting gun
Using a tufting gun has several benefits that make it an ideal tool for upholstery projects. Firstly, it is incredibly efficient and saves time compared to traditional hand-tufting methods. With a tufting gun, you can create tufts in seconds and move on to the next section of your project without wasting any time.
Secondly, using a tufting gun ensures consistency in your work. Traditional hand-tufting requires skill and practice to achieve consistent results, whereas with a tufting gun, you can easily adjust the depth and height of each tuft to match the previous ones.
Lastly, a tufting gun is ergonomically designed to reduce strain on your hands and wrists during long upholstery sessions. It allows for better control over the needle’s direction and pressure while also reducing repetitive strain injuries that are common in manual upholstery work.
Overall, using a tufting gun will significantly speed up your upholstery projects while ensuring consistent results with less physical strain on your body.
How to use a tufting gun
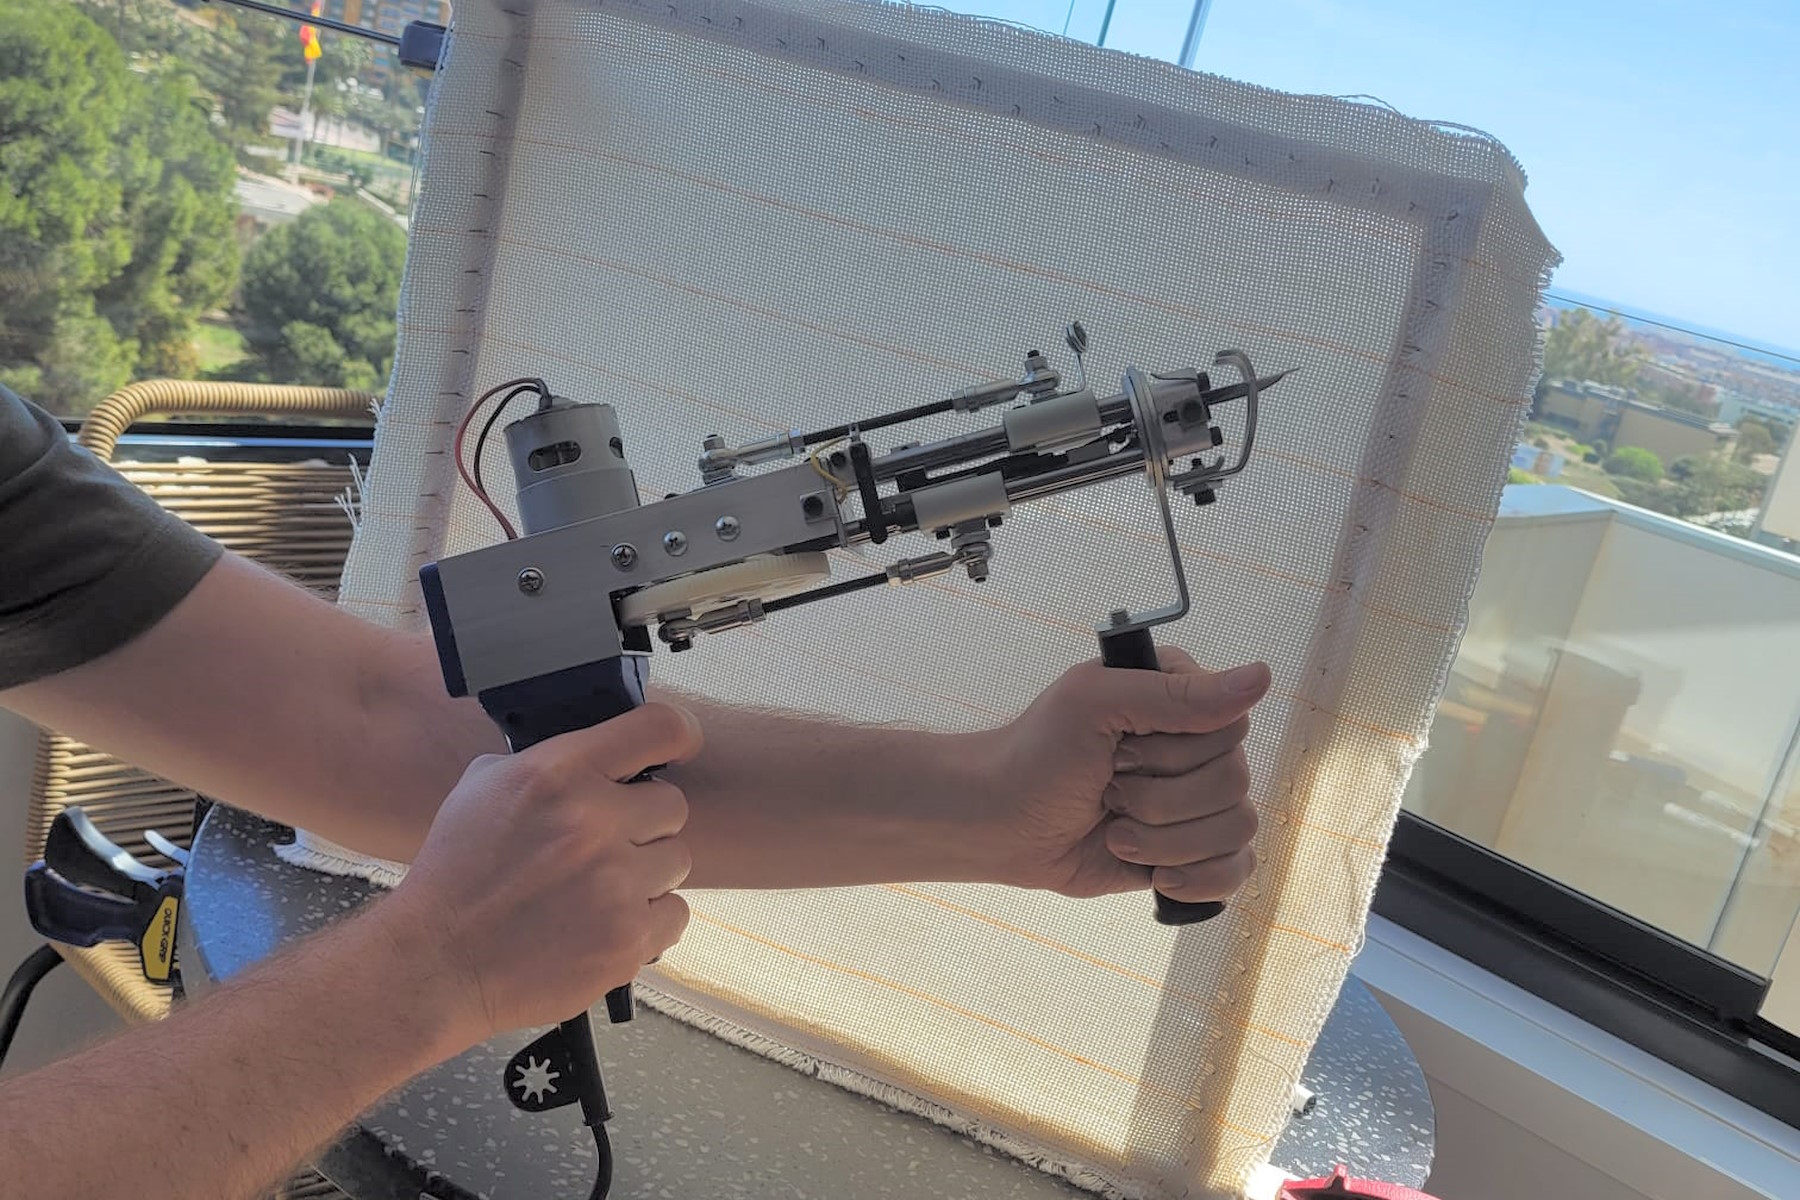
A tufting gun is a powerful tool that can make upholstering projects easier and more efficient. To use a tufting gun, begin by selecting the appropriate size needle for your project and attaching it to the end of the gun. Next, insert the needle into your fabric where you want to place a tuft. Press down on the trigger to shoot the tufting material into the fabric.
One important thing to keep in mind when using a tufting gun is that it can be dangerous if not used properly. Always wear safety goggles and work gloves to protect yourself from flying debris. Additionally, be sure to practice on scrap fabric before beginning your project so you can get a feel for how much pressure is needed when pulling the trigger.
With some practice, using a tufting gun can greatly speed up your upholstery projects and produce professional-looking results. Just remember to follow all safety precautions and take your time when learning this new skill.
Best materials for tufting projects
When it comes to tufting projects, having the right materials is key to achieving a professional-looking finish. One of the best materials for tufting is foam padding. This material provides a soft and cushiony feel that makes furniture comfortable to sit or lie on. Make sure you choose foam padding with the right density and thickness that can withstand regular use.
Another essential material for tufting projects is fabric. Choose fabrics made of natural fibers like cotton, linen, or wool as they are more breathable and long-lasting than synthetic fabrics. Make sure your fabric has enough weight and texture to hold up well when tufted. Velvet, chenille, and woven textiles are some popular options for tufted projects.
In addition to foam padding and fabric, another vital material needed in tufting projects is a strong thread. You’ll want to use a heavy-duty upholstery thread that won’t break easily when pulled tightly through thick layers of foam padding. Polyester or nylon threads are strong options that come in various colors perfect for matching your project’s color scheme. With these materials at hand, you will be able to create beautiful pieces with ease using your trusty tufting gun!
Tips and tricks for successful tufting
1. Choose the right fabric: The first step to successful tufting is choosing the right fabric. Select a material that is thick enough to hold up against tufting, but not so rigid that it will be difficult to work with. Consider using a fabric with a tighter weave for more intricate designs.
2. Plan your pattern: Before starting your tufting project, plan out your pattern and mark where each button will be placed. Use chalk or tape to make sure everything is aligned properly before you begin.
3. Use the right needle size: The size of the needle on your tufting gun can make a big difference in how smoothly the process goes. Choose a needle size that matches the thickness of your fabric for best results.
4. Keep tension consistent: To ensure even and consistent tufts, keep the tension on your fabric taut throughout each stitch.
5. Work in sections: Tufting can be time-consuming, especially for larger projects like sofas or headboards. Break up the process by working in small sections at a time instead of trying to complete everything at once.
6. Practice makes perfect: Don’t get discouraged if your first few attempts at tufting aren’t perfect – practice makes perfect! Take note of what worked well and what didn’t, and adjust accordingly as you go along.
By following these tips and tricks for successful tufting, you’ll be able to create stunning upholstered pieces that are both functional and fashionable!